Welcome...

This blog serves as a behind-the-scenes peek into the life and journal of an interdisciplinary artist. Learn more at merliguerra.com or luminariumdance.org, and thank you for reading my thoughts on setting the visual and performing arts into motion.
Showing posts with label Food as Art. Show all posts

Tuesday, December 1, 2015

Gluten Free, FODMAP Friendly, Maple Almond Cake (with Fig)


This year marked yet another first, as Sean and I geared up to host Thanksgiving. With many of the same guests attending as Easter, we were once again faced with the challenge of creating a gluten free, FODMAP friendly meal. This limitation led to moments of frustration (naturally), some impromptu creativity, and (surprisingly) a good laugh—especially when our midnight tastings of Sean's ginger carrot soup revealed that the plain, pared down recipe came out twice as good as its more complex counterpart taking up the remainder of our fridge! Still, soup aside, it proved to be a bit of a challenge.

For dessert, I set my sights on a maple nut cake. FODMAP makes this tricky, as you can't be too heavy on nut meal, and certain nuts need to be rationed per serving. Luckily, with a mixture of almond flour and coconut flour, we were good to go.

My first attempt proved disastrous. After being warned of the things that can happen when baking gluten free, I pulled out of the oven a test case in everything that could possibly go wrong: The sides rose, the center sank, it crumbled at a glance, yet still managed to greet me with a pasty consistency despite extra time in the oven. The flavor was decent, but trying to remove the "cake" from the pan had me scooping it with a spoon like ice cream. This was not the recipe for me.


After hours of seemingly hopeless research later, I came across a recipe that proffered a similar taste with more eggs to glue it all together. A huge thank you goes to Bob's Red Mill for supplying the Almond Meal/Flour and cake recipe. *One note, for my cake, I chose to tweak it from almond cake to maple almond cake. Following their recipe, I simply skipped the step of adding 1/4 teaspoon almond extract, and instead added 1/2 teaspoon maple extract. The resulting flavor was a delicious blend of maple, almond, and a hint of coconut. Incredible, even on its own! (You can find their recipe, and my tweaked version at the end of this entry.)


For my cake, I chose to split the batter evenly and pour it into two 6" round pans. I cooked the two cakes for 40 minutes, checking them at the 35 minute mark, and ultimately having the toothpick come out smoothly at 40.


After allowing both to cool overnight, I carefully removed them from the pans, sliced off the top of the one of the cakes (to allow for better stacking), then applied a hearty layer of fig jam from the local farm stand.

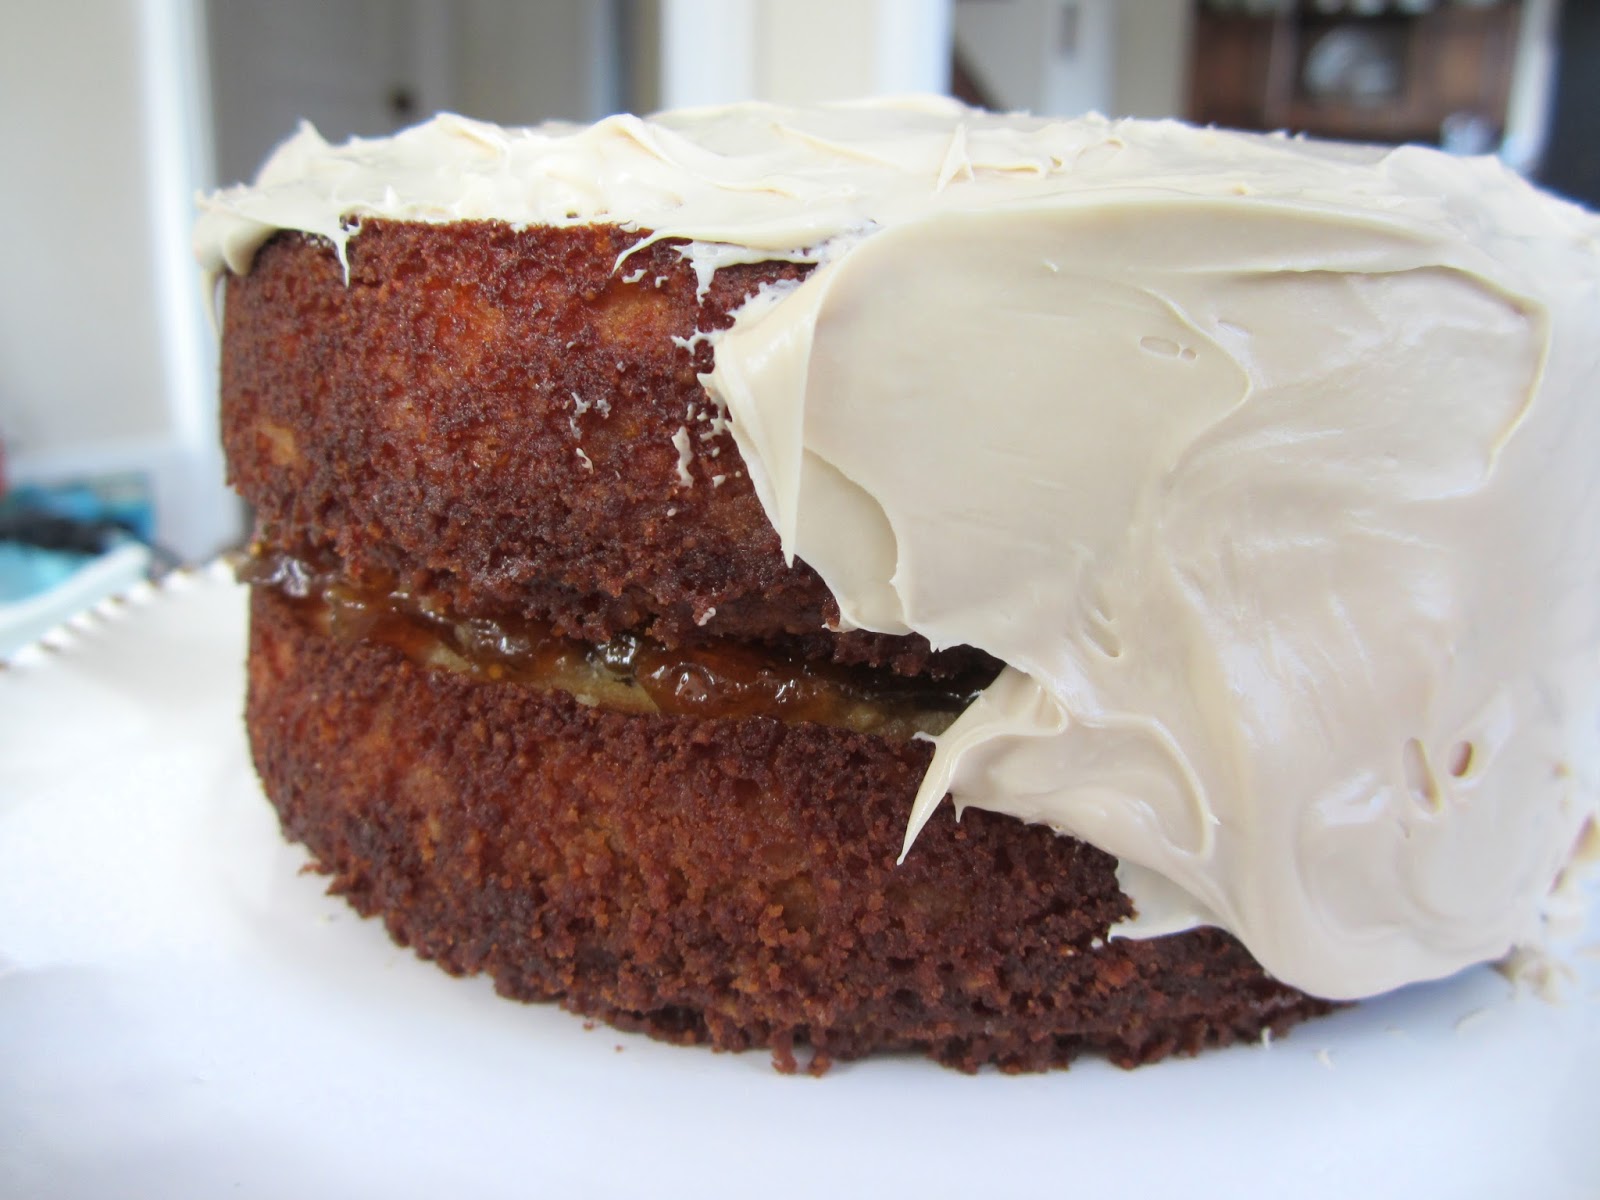


For those who are short on time, I can completely relate. Grabbing a can of gluten free vanilla icing, I simply added maple extract to taste, then coated the two cakes to give it that extra hint of maple.


For a final step, I chose to mix a healthy helping of sliced almonds and walnuts in a bowl with a dollop of maple syrup and a sprinkling of brown sugar and sea salt: Layer them across a tin foil-covered sheet and bake them at 375 degrees—in just 10 minutes you'll have a crispy, sugary tray of toasted nuts, perfect as a garnish for this scrumptious cake!


And here it is! The final masterpiece. It sat well in the stomach of our FODMAP guest, and one week later it's still just as moist and crumble-free as it was on day one. All-in-all, a gluten free success!


Gluten Free, FODMAP Friendly, Maple Almond Cake (with Fig) Recipe
Prep time: 25 minutes
Bake Time: 40 minutes
Serves 8-10 guests

This recipe is a tweaked version of the Bob's Red Mill "Magically Moist Almond Cake," and creates two delicious 6" cakes, stacked together with fig filling, coated in vanilla maple icing, and topped with sugared nuts.

What you'll need...

For the cakes:
  • Two 6" cake pans (ideally spring cake pans)
  • 3/4 cup unsalted sweet cream butter (soft)
  • 1 cup sugar
  • 4 eggs
  • 1/2 cup milk
  • 1 tsp vanilla extract
  • 1/2 teaspoon maple extract
  • 1 1/2 cups almond meal/flour
  • 1/2 cup coconut flour
  • 2 tsp baking powder
  • 1/4 tsp sea salt
For the frosting:
  • 1 can vanilla or buttercream frosting
  • Maple extract to taste 
For the nuts:
  • 1/4 cup sliced almonds
  • 1/4 cup chopped walnuts
  • A dollop of maple syrup
  • 2 teaspoons brown sugar
  • A sprinkling of sea salt (to taste)
Instructions...

1. Preheat the oven to 350°F, and coat the insides of two 6" cake pans with olive oil spray (or whatever method you prefer).

2. Cream the sugar and butter as best as humanly possible. Add in the eggs and beat by hand until blended. Add the milk and extracts and stir until fully mixed.

3. In a separate bowl, combine the almond flour, coconut flour, baking powder, and salt. Gradually stir it into the wet mixture and beat until creamy.

4. Evenly divide the cake batter between your two pans. Pop in the oven for 35-40 minutes. For me, I checked it at the 35-minute mark with a toothpick and decided it needed the full 40. When ready, the toothpick should come out clean. (Adjust the time based on your own oven's tendencies and how large a cake you're making. Since my dish was only 6" wide, I had to cook it much longer than the original 8" recipe on the Bob's Red Mill website.)

5. Allow the cake to fully cool. Carefully remove them from the pans, then slice off the top of one of the cakes to even it out for stacking. Apply the fig jam to this cake, then place the other on top and apply gentle pressure.

6. Add maple extract (to taste) to the vanilla frosting, stir it in evenly, then coat the entire cake.

7. Turn the oven up to 375°F. Toss walnuts and almonds into a bowl. Drizzle maple syrup, brown sugar, and sea salt into the bowl, then mix. Line a try with tin foil and spread the nuts out. Cook for only 10 minutes, then promptly remove to avoid burning.

8. Allow the nuts to cool, then break them apart, garnish the cake and serve!

Sunday, April 12, 2015

Gluten-Free, Dairy-Free, FODMAP-Friendly, Coconut-Maple Panna Cotta

Whew. Could that title be any longer? Actually sure—with one simple substitute, this dish can even become vegan.* What's not to love?

Gluten-Free, Dairy-Free, FODMAP-Friendly, Coconut-Maple Panna Cotta
Photo: Merli V. Guerra

I recently had the fun opportunity to host Easter dinner for a small gathering of family and friends (small by my Italian/Portuguese/French-Canadian standards equals nine people), with one tiny dilemma. One of our guests had spent the past year struggling with a sudden onset of dietary issues and was ultimately diagnosed with needing to follow the FODMAP diet. So while my boyfriend set forth to create a FODMAP-friendly meal (no small feat, might I add!), I was left pondering my own specialty: Dessert.

The thought process went a little something like this:
"So pastries, coffeecakes... I'm guessing those are out?"
"Right. I'm not technically celiac, but the FODMAP diet encourages me to be gluten-free, which seems to be working."
"Ok, maybe instead I can do some kind of chocolatey—"
"—Sorry!! I can't do chocolate."
"Ok, maybe a fruit salad?"
"Well... Most fruits I can't eat. Only a few I can. And I can eat berries, but not blackberries."
"Ok, racist-berry-eater, how about jello?"
"Hmmm... Let me check!" (And after a brief pause) "Actually, yes! Jello I can do."

So with gelatin now on the table, thus began my rush to the web to find the perfect dessert. After a little digging (and a lot of lip-smacking) various blogger recipes for coconut panna cotta began to catch my eye. Yet with honey off limits, I was thrilled to find one recipe with a maple syrup substitute that was finally 100% legal to my FODMAP-restricted delight.

My amazing roommate models the successful Easter desserts as our guests
likely wonder what's taking so long in the other room...
Photo: Merli V. Guerra 

A huge thank you to blogger The Detoxinista for her Easy Coconut Panna Cotta recipe. She's right—It's incredibly easy, requires just four ingredients (Coconut milk, pure maple syrup, pure vanilla extract, and gelatin), and took only about 20 minutes to make.

To give my dessert a little extra flair, I added a layer of
beautiful pure, golden maple syrup.
Photo: Merli V. Guerra

To add an extra splash of sweetness and artistry, I chose to make two batches of the panna cotta, allowing the first to set overnight in two beer flights. Next—and with science thankfully on my side—I pulled the gelled flights out in the morning, poured a quarter-inch of pure maple syrup into each, then immediately poured my second batch of panna cotta on top. Luckily, my guess was right! The syrup sank while the panna cotta liquid rose. Popping both flights back into the fridge to set for another 3–4 hours, I returned in time to serve them, adding a colorful smattering of berries and a sprinkle of sugar on top. The result was as visually successfully as it was tasty, and caused the bottom layer to most closely resemble a flan or French crème caramel. Truly an easy, dietarily-friendly dessert that I encourage everyone to try.

Photo: Merli V. Guerra

And for those trying to replicate this at home, here are a few tips:

  • If you've never used pure coconut milk before, don't be too startled if you open the can and find it solidified! Just carve it into a pan and heat it gently until it liquefies, being careful not to boil it.
  • Using two batches of The Detoxinista's recipe, I was able to comfortably fill ten 5-ounce tasting glasses. Don't forget to pick up extra syrup for the middle!
  • *For those looking to make this a vegan dish, I'm told you can replace the gelatin with agar agar. Having never tried this myself, I welcome feedback on how this goes and what amount to use!
Enjoy...

Photo: Merli V. Guerra

Saturday, May 3, 2014

When Baking Meets Arts & Crafts

When you spend a lot of time with people who have an innate knack for cooking, I find it's best to hide my lack of knowledge in the field by tossing in a little artistic flair instead.

And thus, on a Saturday morning, my roommate caught me doing this:


Ocean Scene Lemon & Vanilla Cupcakes!

Baked them a little extra so my beach would be golden brown...


Add a little ocean crest...


Throw in a few goodies...


Swirl in a few drops of blue...


Arrange my little chocolate buddies...


Four extra, just in time for Luminarium's Gala Committee meeting!


 A fun way to start the day, and a tastier way to end it!

Tuesday, November 22, 2011

Curing the Concussion...Or is the Concussion the Cure?

Head injuries are a funny thing.

In a way, they halt every aspect of your life (no reading, no TV, no concentrating on a computer screen, no physical activity), allowing you nothing but time to think. On the other hand, even heavy thought is discouraged as you mend! Unfortunately, this brain never stops. And given the extra time, I found myself overflowing with new insights on choreography, artistry, business, and life.

Day 1 - The Injury
After a beautiful morning of graceful, yet exhilarating lifts during rehearsal (not Luminarium), I found myself falling backwards to the ground, with a resounding thud as my head (and only my head) collided with the floor. An unfortunate, and purely accidental, slip.

Fast-forward to a few hours later at work, feeling and looking violently ill, and joking about having a concussion. Still, I was so determined to see Trisha Brown at the ICA with Kim that I figured I'd tough it out and take the T. It was worth the hassle. Such a wonderful performance space, complete with a view of Boston Harbor behind the stage. (Though I must admit that both Kim and I had the same reaction to the performance: Beautiful movement, furstrating choreography. For a complete and excellently-articulated account of the performance, check out Kim's blog post HERE.) Little did I know this was the last hoorah for my now fully-concussed brain.


Day 4 - The Diagnosis
So, yes, it shamefully took me four days to realize that a concussion doesn't simply hit you hard then get better with time. Monday night brought a painfully slow visit at the ER, some scans, and some good news: Concussion, yes; Severe damage, no. And thus began my recommended treatment of turning off my brain and staring at the wall.

Day 6 - The Reclaiming...
...of my life! Finally! It is amazing how little time I devote to taking care of myself in certain aspects. By Day 6, I was handed a decent amount of energy and the inspiration to clean everything. Organized my files, cleaned the apartment, and when all was done and boredom began to sink back in...out came the Christmas decorations.

Those who explored Paris with me might recognize this
candy-tin-turned-candle-holder from one of the city's
most delightful little chocolate shops!

Snowflake time with the roommate!
Plus a gorgeous pink Gerber daisy from Russo's.

Katie's fun little tree from TJMaxx. Meanwhile, I'd just
brought home a real tree for the living room. Perfect.

"I'm making a winter wonderland in the kitchen," I texted to my poor roommate, as I pulled out the hammer and fairy lights, "How good are you at making paper snowflakes?" Now, I'm no Kaitlin McCarthy, Queen of Intricate Snowflakes (ranging from Christmas tree flakes to Manora flakes), but seeing as our skylight began like this...


And now looks like this...


I think it's coming together rather nicely.

Day 12 - The Present
It's been a week and a half since the fall, and in many ways I am grateful for the sudden, forced speedbump in my hectic routine. It served as a chance for me to separate myself from all electronics, paperwork and (dare I say it) even dance. It gave me a moment to breathe, to reflect, to reorganize, and--most importantly--to reconnect with many friends over the phone and in person. However, I'm not what I normally am. I'm not the tireless, multi-tasking machine that I was two weeks ago. Even Kim has commented on how strange it is to witness me in such a spacey/sleepy state of being. In fact, in many ways I'm feeling like the cupcakes I made tonight:

Friday shook me up, left me feeling disjointed and wobbly...


And by now, while whole again, I still don't feel completely like myself. I seem to be missing the flair that is Merli...

mmmm... Tasty Lemon cupcakes.
But what's missing?

Ah ha!


That's what I'm looking for. Well, it seems my cupcakes are more energetic than I am at the moment, but give me another week or two, and hopefully I'll be crazy, colorful, and concussion-free, too.

Wednesday, April 27, 2011

The "Art" of Learning to Cook!

This entry, while not as artistically driven as my others, is an homage to Kaitlin McCarthy: an artist on the dance floor, and as anyone who's read her blog knows, an artist in the kitchen as well. So here's to passing on the sweet success of my most recent breakthrough as a chef...

Pesto & Cream Cheese Stuffed Chicken Breasts
Ingredients:
(Keep in mind, I eyeballed everything based off of several recipes, so don't take these measurements too literally!)
Two Chicken Breasts
About 1 1/2 - 2 Tablespoons of Pesto
2 Ounces of Cream Cheese (Less or more depending on your love of pesto over cream cheese.)
Pepper to Taste
Bread Crumbs
Parmesan Cheese
One Egg

Setting the Recipe into Motion...
1. Make a butterfly cut in the chicken. I had no idea what that meant, so I just sliced up the back, then sliced horizontally inside to make a pouch in each piece.
2. Combine the pepper, cream cheese and pesto in a bowl.
3. Stuff each chicken breast, pressing the chicken together when finished.
4. Beat the egg, and prepare a plate of bread crumbs and grated parmesan cheese mixed together.
5. Dip the chicken into the egg, holding it together, then lay it in
the crumbs/parmesan to make a crust before putting it in a baking dish.
6. Cook for 25 minutes at 400 degrees.

I chose to serve it with Near East's 5-Minute Couscous (garlic and oil...very tasty), along with a light salad. I was shocked at how easy it was, and even more shocked at how delicious! As I gradually build confidence in the kitchen, I hope to pass on some little recipes I find easy and fun, so feel free to send some good ones my way to try too!